검색결과 리스트
Computer & Smartphone에 해당되는 글 25건
- 2016.05.10 해외폰 SKT 사용시 데이타 APN설정 5
- 2016.03.23 중국의 자존심 Huawei mate 8 (듀얼유심) by 소민섭 2
- 2014.08.01 flight of Quadcopter 쿼드콥터 비행동영상 By 소민섭(Kelvin)
- 2013.05.17 USB Memory를 Primary Boot Disk 만들기[출처: 캐플블로그] 4
- 2011.05.06 Flexible Display Pannel 그런데 배터리는 우짜노...
- 2011.03.14 Blackberry Bold 9000 Unlock
- 2011.03.13 Google Chrome OS
- 2010.06.07 CNET NEW 새로운 정보기기 소개
- 2010.04.15 Black Berry Fuel Case 블랙베리 배터리 내장 홀스터 케이스 입니다.
- 2008.10.30 구글어스( Google Earth)로 네비게이션을 사용 해볼까?
- 2008.10.10 터보 메모리 레디부스트 활성화 하기(Turbo Memory ReadyBoost)
- 2008.09.27 SATA HDD 설정하기
- 2008.08.17 BIOS Upgrade ThinkPad X- 시리즈 USB Boot Disk 만들기 11
- 2008.08.16 BIOS Upgrade/X Series - ThinkPad
- 2008.07.16 Gmail을 하드드라이브 같이 써보자..
글
해외폰 SKT 사용시 데이타 APN설정
첫화면은 APN 설정 이름 입니다.


글
중국의 자존심 Huawei mate 8 (듀얼유심) by 소민섭


저는 byblekorea 에서 구매 했네요.. 자체 보증책임제도 있고 믿을만 한것 같아요.전 거기서 두번째 구매네요.
글
flight of Quadcopter 쿼드콥터 비행동영상 By 소민섭(Kelvin)
요즘 근거리 항공 촬영에 많이 사용하고 있는 쿼드콥터 동영상을 직접 찍어 보았네요.
이걸로 미쿡선 피자 배달도 시도한다고 하죠..
글
USB Memory를 Primary Boot Disk 만들기[출처: 캐플블로그]
예전에 윈도우 PE 에 대해서 이야기를 한 적이 있었죠? 윈도우 PE 가 무엇이었나요? 윈도우 PE 란 윈도우 사전 설치 환경으로 윈도우 설치에 활용하기 위한 어느 컴퓨터에서나 부팅할 수 있는 작은 윈도우라고 하였습니다. 원래 태생은 그렇고 이제 간단한 프로그램 정도는 실행할 수 있기에, 써드 파티 프로그램의 복원이나 간단한 시스템 관리 툴을 탑재하는 용도로 많이 사용되고 있다고 하였죠. 아무튼 윈도우 PE 는 이러한 목적으로 개발된 것이다 보니 기능이 매우 제한적입니다.
하지만 이러한 제한 속에서 윈도우 PE 를 좀 더 쉽고 강력하게 활용하기 위해 많은 분들이 다양한 방식으로 커스터마이징하였고, 그를 통해 거의 윈도우와 비슷하게 환경을 구축한 버전들도 종종 보이곤 합니다. 그러한 버전들은 굉장히 편리했지만 그래도 어쩔 수 없는 PE 기반인지라 어느 정도의 한계는 있었습니다.
그런데 윈도우 8 에는 Windows To Go 라는 기능이 새롭게 추가되었습니다. 이게 사실 그동안 많은 분들이 염원하던 기능인데요. 이게 안 되서 윈도우 PE 를 이리 쑤시고 저리 쑤셔서 커스터마이징을 했던 거라고 할 수 있습니다.
자~ 그렇다면 Windows To Go 란 무엇이냐? 한 마디로 윈도우를 그냥 USB 이동식 저장 장치에 설치해서 들고 다니는 겁니다. 이렇게 USB 이동식 저장 장치에 설치된 윈도우는 일반적인 로컬 디스크에 설치한 윈도우와 똑같습니다. 프로그램은 물론 드라이버도 설치할 수 있죠. 완전히 똑같습니다. 그냥 윈도우에요. 단지 USB 메모리나 USB 외장 하드에 설치했을 뿐입니다.
이게 끝이냐? 이렇게 USB 이동식 저장 장치에 설치된 윈도우는 윈도우 PE 처럼 어느 컴퓨터에나 연결하여 바로 사용할 수 있습니다. 그러니까 그냥 윈도우를 통채로 들고 다니면서, 아무 컴퓨터에 연결하여 바로 사용할 수 있는 거죠. 굉장히 매력적이지 않나요?
Windows To Go 의 구축은 별거 아닙니다. 아래의 내용만 기억하세요.
2. USB 외장 하드에 윈도우를 설치한다.
3. USB 외장 하드로 부팅한다.
끝입니다. 정말로요. 이거 말곤 없어요. 그럼 시작하죠. ^^
1. 사전 준비물
윈도우 8 의 설치 이미지를 곧바로 풀어줄 수 있는 ImageX.exe 만 준비하시면 됩니다. 아래 파일을 다운로드 받으셔서 어디에서든 실행할 수 있도록 C:\Windows\System32 폴더에 넣어두세요.
 imagex.exe
그 외에 BCDBoot 나 DiskPart, 좀 더 뒤에서 BCDEdit 작업도 진행해야 하니 윈도우 7 이나 윈도우 8 이 설치된 컴퓨터에서 작업하시는 걸 추천합니다. 그래서 일단 관련된 작업들이 힘든 윈도우 XP 사용자는 배제하도록 하겠습니다.
그리고 최종적으로 USB 외장 하드로 부팅하였을 때 설치를 마무리 짓기 위해 제품 키가 필요하니 아래의 제품 키를 미리 다른 곳에 적어 두시면 됩니다. [해당 키는 릴리즈 프리뷰 때 사용되던 키입니다. 정식 버전에선 사용할 수 없습니다.]
2. USB 외장 하드(USB 메모리)의 준비
일단 윈도우를 설치할 충분한 용량의 USB 외장 하드나 USB 메모리를 준비해야 합니다. 참고로 USB 메모리보다는 USB 외장 하드가 좋습니다. 이게 왜 그러냐면요. 말 그대로 USB 저장 장치 그 자체에서 윈도우가 돌아가는 거라 그렇습니다. Read 는 문제가 안 되는데요. 아시다시피 윈도우는 구동되는 순간부터 끊임없이 Write 작업을 수행합니다. 그래서 저가형의 TLC 셀을 사용한 플래시 방식의 USB 메모리는 이 Write 작업을 감당하기가 힘듭니다. 그러니까 이건 성능의 문제가 아니라 USB 메모리가 사느냐 죽느냐의 문제가 됩니다.
그래서 USB 메모리를 사용하실 거라면 윈도우의 잦은 Write 를 견딜 수 있는 최소 MLC 나 SLC 급의 USB 메모리를 준비하시는 게 좋습니다. 근데 보통의 USB 메모리에서도 SSD 와 같이 각 셀이 사용된 횟수를 기록, 최대한 분산 저장하여 셀의 수명을 늘려주는 웨어 레벨링 기능을 지원하는지 살짝 헷갈리는데요. 안 그런다면 MLC 나 SLC 더라도 수명을 장담하긴 좀 그렇겠네요.
아무튼 그래서 Widnwos To Go 에는 HDD 방식의 USB 외장 하드가 좋습니다. 대충 2.5인치 급이 효율적이지 않을까 생각하네요. 참고로 3TB 급의 외장 하드는 GPT 로 사용되는지 MBR 로 사용되는지 정확하게 모르겠는데요. 아무튼 이번 글에서 3TB 급의 외장 하드는 제외하도록 하겠습니다. 아래의 내용들은 2TB 이하 급에서만 해당하는 설명입니다.
자 이제 잡설은 그만하고 그럼 준비한 USB 외장 하드(USB 메모리)를 시스템에 장착합니다. 그리고 드라이브 문자를 파악합니다. 저 같은 경우에는 G: 드라이브네요.

자 이제 중요한데요. 이 USB 외장 하드를 부팅 가능하게 그리고 윈도우 8 을 설치할 수 있게 만드려면 USB 외장 하드의 파티션이 주 파티션이어야 하고 NTFS 로 포맷되어 있어야 합니다. 거기에 더해 보통 MBR 기본 디스크겠죠?[EFI 부팅을 할 게 아니라면] 이 세 가지 조건이 맞으면 그냥 파티션을 활성화만 해주고, 부트 섹터만 NT60 형식으로 수정해주면 됩니다. 그럼 부팅할 수 있습니다.
근데 귀찮잖아요? 그러니까 여기에서는 그냥 외장 하드를 깨끗하게 정리하고 처음부터 새로이 구성하는 것을 기준으로 잡겠습니다. 그게 확실하니까요. 먼저 USB 외장 하드의 중요한 데이터는 백업하세요. 아래의 작업을 진행하면 USB 외장 하드의 데이터가 모두 사라집니다.
clean
create partition primary
format fs=ntfs quick label=WTG-Disk
active
assign letter=G
exit

그러면 아래와 같이 부팅 가능한 USB 외장 하드가 준비됩니다.


USB 외장 하드의 준비는 이게 끝입니다. 간단하죠?
활성화된 주 파티션, 기본 MBR Boot Code, NT60 형식으로 설정된 부트 섹터, DiskPart 작업으로 이 세 가지가 모두 갖추어진 거죠. 그럼 이제 BOOTMGR 부트 매니저만 설치해서 구성하면 해당 USB 외장 하드로 부팅할 수 있습니다. 이걸 위해 DiskPart 작업을 한 것이고, 이 세 가지를 위한 가장 간단하고 확실한 방법이 바로 지금 알아 본 것과 같이 DiskPart 를 통해 디스크를 통채로 정리하고 그냥 처음부터 구성하는 겁니다. 다른 방법을 사용하시더라도 이 세 가지만 맞춰주시면 됩니다.
3. 윈도우 8 설치 - Install.wim 이미지 풀어주기
자 이제 부팅할 수 있도록 준비된 USB 외장 하드에 윈도우 8 설치 이미지를 직접 풀어주는 방식으로 윈도우를 설치할 겁니다. 이처럼 Install.wim 이미지 파일을 직접 풀어서 설치하는 작업에는 ImageX 가 필요하고, 그래서 제일 처음에 해당 파일을 제공해 드린 겁니다. 제가 말한대로 C:\Windwos\System32 폴더에 해당 파일을 넣어두시면 어디에서든 사용 가능하니 그렇게 두시고요.
이제 윈도우 8 설치 DVD 를 준비합니다. 보통 ISO 파일 형태로 가지고 계실텐데 가상 CD-ROM 에 장착하거나, 압축을 풀거나 뭐 편한대로 준비하세요. 저는 H: 드라이브에 윈도우 8 설치 DVD 를 준비했습니다.

이제 우리에게 필요한 건 \Sources\Install.wim 파일입니다. 저 같은 경우에는 H:\Sources\Install.wim 이 되겠죠? 만약에 ISO 파일의 압축을 풀어서 준비했다면 아래의 작업에서 Install.wim 파일의 전체 경로를 적절히 자신에게 맞춰야 합니다. [Install.wim 파일만 특정 드라이브의 루트로 복사해두고 해당 파일로 작업하셔도 됩니다.]
다음으로 Install.wim 파일에는 이미지가 하나만 들어있는 게 아닙니다. 원래 각 에디션의 개수만큼 이미지가 들어있죠. 그리고 그러한 각 에디션의 이미지들은 1 번 이미지, 2 번 이미지, 3 번 이미지... 같이 인덱스 번호라는 것으로 지정되어 있고 이를 통해 에디션을 구별합니다.
그런데 지금 글을 쓰는 시점의 윈도우 8 은 RP 버전이고, 32비트 버전이나 64비트 버전 모두 이 RP 에디션 하나 밖에 들어있지 않습니다. 그래서 32비트 버전이나 64비트 버전이나 모두 이미지 인덱스는 1 이 됩니다. [나중에 정식 버전이 나오고 WTG 를 지원하는 에디션이 정확하게 어떻게 될 지 현재는 모릅니다. 아무튼 정식 버전이 나오면 이 인덱스 번호는 분명 달라질 겁니다.]
그럼 작업에 필요한 내용들을 정리할께요.
윈도우 8 DVD - H: [H:\Sources\Install.wim]
이미지 인덱스 - 1
필요한 준비를 모두 마쳤으면(ImageX 준비까지) 아래의 작업을 진행하여 윈도우 8 을 USB 외장 하드에 설치합니다.

그러면 아래와 같이 USB 외장 하드에 윈도우 8 이 설치됩니다.

이제 마지막으로 이렇게 설치된 윈도우 8 에 대한 부팅을 구성하면 됩니다.
4. USB 외장 하드에 부팅 구성하기
현재는 윈도우가 설치만 되었을 뿐 아직 부팅은 구성되지 않은 상태입니다. 이제 BCDBoot 를 통해 이렇게 USB 외장 하드에 설치된 윈도우에 대한 부팅을 USB 외장 하드에 구성할 겁니다. 중요합니다. USB 외장 하드 자체에 부팅을 구성하는 겁니다. 그래야 어느 컴퓨터에서든 부팅할 수 있을테니까요. 그러니 이 과정을 마쳐야 USB 외장 하드에 설치된 윈도우 8 으로 부팅할 수 있습니다.
일단 제가 제일 처음에 참고했던 외국의 자료에선 BCDBoot 작업에서 /f ALL 매개 변수를 주어서 BIOS 부팅 구성에 EFI 부팅 구성까지 함께 구성을 하던데요. [/f BIOS, /f EFI, /f ALL] 현재 글에선 EFI 부팅은 사용하지 않고 논외로 칠 것이기에 이에 대한 구성은 안 할 겁니다. 참고하세요.
아무튼 이제 다음의 작업을 진행하여 USB 외장 하드에 BOOTMGR 부트 매니저를 설치하고 설치된 윈도우 8 에 대한 부팅 항목을 구성합니다.

그러면 USB 외장 하드에 기본 바이오스 부팅 구성인 [BOOT] 폴더 및 기타 필요한 부팅 파일이나 설정 등이 모두 자동으로 구성됩니다. [해당 파일들의 확인은 시스템 파일 및 숨김 파일을 볼 수 있도록 설정해야 합니다.]

모든 작업이 끝났습니다. 이제 USB 외장 하드로 부팅하여 나머지 윈도우에 필요한 제품 키를 입력하고 사용자 계정에 대한 설정만 마치시면 됩니다.
5. USB 외장 하드로의 부팅 및 윈도우 설치 과정 완료
이제 시스템을 종료하고 지금까지 준비한 USB 외장 하드로 부팅을 진행합니다.

피처폰이라 화질 죄송...
참고로 현재 이미지를 직접 풀어주는 방식으로 설치를 진행하였고 윈도우 8 RP 버전이기 때문에 아래와 같은 제품 키를 입력해야 합니다. 제품 키는 미리 말씀드렸죠?

과정 중간 시스템의 재부팅 과정이 포함됩니다. 재부팅되면 다시 USB 외장 하드로 부팅을 하시면 됩니다. 아무튼 그 외 나머지 설치 과정은 윈도우 8 릴리즈 프리퓨의 설치 과정 살펴보기 글을 참고하시고요. 이번 글에서는 생략하도록 하겠습니다.
6. Windows To Go 설치 완료
설치를 완료하시면 로컬 디스크에 설치한 윈도우와 모든 게 동일합니다. 그러니 똑같이 사용하시면 됩니다. 만약에 사용자 계정으로 Microsoft 계정을 사용하시면 기존 윈도우와 설정이 동기화되니 더욱 편리하겠죠.


참고로 로컬 디스크에 설치된 윈도우와 모두 동일하다고 했죠? 그래서 윈도우가 설치된 USB 외장 하드가 C: 드라이브가 됩니다. 이점 기억하시고요.

그리고 32 비트 버전의 경우엔 로그인시 표시해주지 않던데 64 비트 버전의 경우엔 로그인시 아래와 같이 표시해주더군요.

즉, USB 외장 하드에 설치된 윈도우를 사용 중이기 때문에 사용 중간 USB 외장 하드를 임의로 분리하지 말라는 의미입니다. 실수로 USB 외장 하드를 분리하였다 할 지라도 1 분 이내에 다시 연결하면 그대로 사용이 가능하며 만약에 1 분이 지나면 자동으로 시스템이 종료됩니다.
이제 이렇게 준비된 윈도우에 프로그램이나 기타 필요한 드라이버 등을 설치하여 사용하시면 됩니다. 즉, 평상시 윈도우 사용하던 그대로 사용하시면 되는 겁니다. 그리고 이렇게 프로그램 등의 설치를 모두 완료하고 본인에 맞게 셋팅이 완료되었으면 USB 외장 하드를 가지고 다니면서 아무 컴퓨터에나 연결하여 부팅하면 그대로 사용을 할 수 있습니다. 굉장히 매력적이죠?
참고로 이렇게 Windows To Go 에 설치한 하드웨어 드라이버는 해당 컴퓨터에서만 작동 합니다. 즉, 서로 다른 컴퓨터에 연결할 때마다 서로 다른 드라이버를 가져온다는 것이죠. 그래서 사용할 컴퓨터마다 연결한 후 모두 드라이버를 설치해 두시면 연결된 컴퓨터에 맞게 드라이버가 자동으로 구성됩니다.
다음으로 윈도우의 셋팅에 관한 것은 제가 크게 이야기할 부분은 아닌 것 같고요. 다만 가지고 다니면서 한 번씩 사용하는 용도의 특성상 최대 절전 모드와 시스템 복원 기능은 기본적으로 꺼져 있습니다. [Http://technet.microsoft.com/library/hh831833.aspx] 뭐 딱히 켤 필요도 없을거라 생각되고요. 그 외의 설정은 개인의 판단에 맡기겠습니다. 적절히 최적화 해보세요.
그리고 이것이 참고가 될 지 모르겠지만 제 시스템의 경우 키보드 및 마우스가 모두 USB 입니다. 그런데 이게 USB 외장 하드로 부팅하는 과정에서 충돌을 일으켰는지 키보드나 마우스가 안 먹히는 증상이 한 번 생기더군요. 다시 시스템을 완전히 끄고 재부팅하니 정상적으로 연결되었습니다. 그것 외에는 별다른 문제를 발견하지는 못햇습니다.
좀 길게 설명을 했지만 Windows To Go 별거 아니죠? 그냥 윈도우 8 설치할 때랑 똑같고 단지 그걸 USB 외장 하드(USB 메모리)에 설치했을 뿐입니다. 개념은 매우 단순하지만 그동안 많은 분들이 바래왔던 기능이고 잘만 활용하면 매우 유용한 기능이 되리라 믿어 의심치 않습니다.
Windows To Go 를 VHD 에 설치할 수 있을까요? 일단 저는 가능했습니다. 즉, USB 외장 하드 안에 VHD 가상 디스크를 생성하고 그곳에 윈도우 8 을 설치하는 게 가능하더군요. 그래서 아마 기본적으로 Windows To Go 가 VHD 까지 지원하도록 설계된 것이 아닌가 생각합니다. [테크넷에는 그런 설명이 없어서...] 뭐 Bitlocker 도 지원을 하는데 이정도는 지원을 해줘야 겠죠? 아니라면 아예 부팅조차 안 되었을테니까요. 그냥 그렇게 생각하자고요.
1. VHD 에 Windows To Go 설치하기
지금까지 설명했던 것과 동일하게 USB 외장 하드를 G: 드라이브라고 놓고 작업을 풀어나가도록 하겠습니다. 그리고 윈도우 8 설치 DVD 는 H: 드라이브에 장착하겠습니다.
작업은 아직 USB 외장 하드가 부팅 가능하게 준비되지 않았다는 가정하에 앞에서와 마찬가지로 DiskPart 의 Clean 작업을 시작으로 깨끗하게 정리하여 구성하는 것으로 시작하도록 하겠습니다. 참고로 VHD 의 준비는 좀 더 빠른 로컬 디스크에서 모두 구성한 후 마지막에 USB 외장 하드로 옮겨도 되고, 그냥 USB 외장 하드에서 바로 작업을 해도 됩니다. 저는 후자로 가겠습니다.
VHD 파일은 USB 외장 하드 루트에 위치해도 되고 영문으로만 구성된 폴더를 만들어 그 아래에 위치시켜도 됩니다. 관리나 구성의 깔끔함은 후자가 낫겠죠? 그래서 저는 루트에 VHD 라는 폴더를 만들고 그 안에 VHD 파일을 넣는 것으로 하겠습니다. 이 때 VHD 파일의 이름은 WTG.VHD 로 하고 (안의 파티션은) V: 드라이브로 연결하죠.
정리하면 아래와 같습니다.
| USB 외장 하드 | G: |
|---|---|
| 윈도우 8 이미지 | H:\Sources\Install.wim |
| 이미지 인데스 | 1 |
| VHD 파일 | G:\VHD\WTG.vhd |
| 가상 디스크 | V: |
ImageX 같은 건 미리 준비하시고 작업은 한 호흡에 가도록 하겠습니다. 숙지하셨고 모든 준비를 마치셨으면 관리자 권한으로 명령 프롬프트를 실행하고 다음의 작업을 진행합니다. [가상 디스크의 용량이나 타입, 레이블은 원하는대로.]
clean
create partition primary
format fs=ntfs quick label=WTG-Disk
active
assign letter=G
exit
md G:\VHD
diskpart
attach vdisk
create partition primary
format fs=ntfs quick label=WTG-VHD
assign letter=V
exit
imagex /apply H:\Sources\Install.wim 1 V:\
bcdboot V:\Windows /l ko-KR /s G:
USB 외장 하드에[G:] VHD 가상 디스크를[G:\VHD\WTG.vhd] 만들고 설정한 후 연결하여[V:] 윈도우를 풀어주고[H:\Sources\Install.wim -> V:\] 그렇게 풀어준 윈도우의[V:\Windows] 부팅 항목을 USB 외장 하드에 구성해주면[G:] 되는 겁니다. 드라이브 문자가 자칫 헷갈릴 수 있기에 색을 칠해 놓았으니 헷갈리지 마세요.
그러면 아래와 같이 USB 외장 하드가 구성됩니다.


끝났습니다. 부팅해서 설치 마무리하고 사용하세요.

2. 자식 VHD 및 초기화 구성하기
자 앞서의 작업으로 VHD 에 Windows To Go 를 설치 완료하였죠? 그대로 사용해도 좋지만 VHD 의 매력은 자식 VHD 이죠! 그래서 자식 VHD 를 구성하고 더불어 깨끗한 자식 VHD 도 구성한 후 간단하게 초기화할 수 있도록 배치 작업까지 해보도록 하겠습니다.
일단 WTG 윈도우에 필요한 프로그램의 설치와 셋팅을 모두 마치고 종료한 후 로컬 윈도우로 부팅합니다. 관리자 권한으로 명령 프롬프트를 실행한 후 다음의 작업을 진행하여 자식 VHD 를 생성하고 깨끗한 자식 VHD 도 준비합니다.
| USB 외장 하드 | G: |
|---|---|
| VHD 파일 | G:\VHD\WTG.vhd |
| 자식 VHD | G:\VHD\WTG-Child.vhd |
| 깨끗한 자식 VHD | G:\VHD\WTG-Clean.vhd |
exit
copy /y G:\VHD\WTG-Child.vhd G:\VHD\WTG-Clean.vhd
자식 VHD 를 준비하였으면 현재 설정되어 있는 부팅 항목을 자식 VHD 로 교체하도록 하겠습니다. 마찬가지로 관리자 권한으로 명령 프롬프트를 실행한 후 다음의 작업을 진행합니다. 이 때 BCD 는 USB 외장 하드의 것을 수정해야 하니 /store G:\Boot\bcd 가 되고 현재 VHD 의 부팅 항목은 기본 부팅 항목이기 때문에 {default} 가 됩니다.
bcdedit /store G:\Boot\bcd /set {default} osdevice vhd="[G:]\VHD\WTG-Child.vhd"
/store 로 수정할 BCD 만 지정해주면 나머지 작업은 시스템 BCD 를 수정할 때랑 똑같습니다. 그러니 뭐 크게 어려운 것은 없을 겁니다. 아무튼 이렇게 작업을 완료하고 나면 최종적으로 아래와 같이 됩니다.


이제 USB 외장 하드로 부팅하여 정상적으로 자식 VHD 로 부팅하는지 확인합니다. USB 외장 하드로 부팅한 후 자식 VHD 의 용량을 확인하면 되겠죠? VHD 로 부팅을 진행하면 자동적으로 확장되니까요.

그럼 이제 VHD 자동 초기화 배치 파일을 만들어 보죠. 수작업으로 윈도우 탐색기에서 교체하는 건 귀찮잖아요.
pushd %~d0
copy /y .\VHD\WTG-Clean.vhd .\VHD\WTG-Child.vhd
exit
이와 같이 배치 파일을 만들고 이름은 적당하게 WTG 초기화.cmd 뭐 대충 이 정도로 저장하면 되겠네요. 이름은 알아서 하시고요. 해당 배치 파일은 USB 외장 하드 루트에 위치시키셔도 되고 VHD 폴더에 넣으셔도 됩니다. 어쨌든 USB 외장 하드에만 위치시키면 됩니다. 그렇게 짰으니까요. 저는 깔끔하게 USB 외장 하드 루트에 넣었습니다.

이제 자식 VHD 의 초기화가 필요하면 로컬 윈도우로 부팅한 상태에서[자식 VHD 로 부팅한 상태에서는 교체가 안 되니] 해당 배치 파일을 한 번 실행하시면 됩니다.

간단하죠?
자식 VHD 1 - G:\VHD\WTG-Child.vhd
자식 VHD 2 - G:\VHD\WTG-Chlid2.vhd
깨끗한 자식 VHD - G:\VHD\WTG-Clean.vhd
이렇게 구성하고 배치 파일을 짜본다면 [현재 깨끗한 자식 VHD 를 복사해서 자식 VHD 2 만 만들면 되겠죠?]
pushd %~dp0
set WTG=%~d0
copy /y .\VHD\WTG-Clean.vhd .\VHD\WTG-Child.vhd
if %errorlevel% == "0" (
bcdedit /store %WTG%\Boot\bcd /set {default} device vhd="[%WTG%]\VHD\WTG-Child.vhd"
bcdedit /store %WTG%\Boot\bcd /set {default} osdevice vhd="[%WTG%]\VHD\WTG-Child.vhd"
) else (
copy /y .\VHD\WTG-Clean.vhd .\VHD\WTG-Child2.vhd
bcdedit /store %WTG%\Boot\bcd /set {default} device vhd="[%WTG%]\VHD\WTG-Child2.vhd"
bcdedit /store %WTG%\Boot\bcd /set {default} osdevice vhd="[%WTG%]\VHD\WTG-Child2.vhd"
)
exit
대충 이런 식으로 작업하면 되겠네요. 그리고 저장하여 초기화가 필요할 때 관리자 권한으로 실행하면 되는 거구요. 이러면 굳이 로컬 윈도우로 부팅할 필요없이 곧바로 WTG 상태에서 초기화된 깨끗한 자식 VHD 상태로 교체되고 다음 번 부팅에 적용되는 거죠.
한 가지 단점이라면 이전에 사용하던 자식 VHD 가 초기화되지 않고 그대로 남아 있는다는 점일텐데요. 그건 아래와 같은 배치 파일을 하나 더 추가적으로 짜서 재부팅 후 해당 배치 파일을 한 번 더 실행해주는 것으로 해결할 수 있을 듯 합니다.
pushd %~d0
copy /y .\VHD\WTG-Clean.vhd .\VHD\WTG-Child.vhd
if "%errorlevel%" == "1" copy /y .\VHD\WTG-Clean.vhd .\VHD\WTG-Child.vhd
exit
작업 스케줄러에 넣어서 자동으로 진행하게 만들어도 되는데 그러면 배치 작업이 좀 복잡해지고요. 그런데 굳이 WTG 에 이런 식으로 구성할 필요까지 있을까란 생각이 드네요. WTG 에 VARS 와 같은 구성을 만드는 것도 좀 넌센스가 아닐까 생각되고요. ㅎㅎㅎ 아무튼 WTG 의 목적을 생각해보았을 때 처음의 로컬 윈도우로 부팅하여 단순하게 교체하는 방식이 가장 나을 것 같네요.
사실 이게 필요할까? 란 생각도 들지만 어떤 시스템에선 32비트로 부팅하고 어떤 시스템에선 64비트로 부팅하고 뭐 그런 걸 원할 수도 있으니까요. 일단 VHD 를 기준으로 놓고 설명을 드릴께요.
추가적으로 하나의 윈도우를 더 VHD 로 구성하여 아래와 같이 준비했습니다.
두 번째 VHD -> G:\VHD\WTG64.vhd -> W: 드라이브로 연결
물론 첫 번째 VHD 는 이미 준비했고 부팅 구성까지 마친 상태라는 가정입니다. 이제 두 번째 VHD 윈도우를 부팅에 추가할 건데요. 첫 번째 윈도우의 부팅 이름을 바꿔주는 작업도 함께 진행할께요. 그래야 안 헷갈릴테니까요. 관리자 권한으로 명령 프롬프트를 실행한 후 아래와 같이 BCDEdit 와 BCDBoot 작업을 진행하면 됩니다.
bcdboot W:\Windows /l ko-KR /s G:
bcdedit /store G:\Boot\bcd /set {default} description "Windows 8 WTG - 64비트"
bcdedit /timeout 10
그런데 이렇게 되면 두 번째 VHD 가 기본 부팅 항목이 되죠. 그걸 원하시는거면 그렇게 사용하시면 되고요. 만약 첫 번째 윈도우를 기본 부팅 항목으로 사용하고 싶다면 다음의 작업을 추가적으로 진행하시면 됩니다.
└ 이를 통해 첫 번째 VHD 윈도우의 식별자를 파악, 이후부터의 {GUID} 는 첫 번째 윈도우의 식별자.
bcdedit /store G:\Boot\bcd /default {GUID}
bcdedit /store G:\Boot\bcd /displayorder {GUID} /addfirst

이제 USB 외장 하드로 부팅하시면 아래와 같이 멀티 부팅 화면이 출력되고 원하는 WTG 윈도우를 선택하여 부팅할 수 있습니다.

참고로 {Default} 즉, 기본 부팅 항목의 설정이 중요한데요. 왜냐하면요. 이렇게 USB 외장 하드에 부팅을 꾸민 경우 기본 부팅 항목은 이 멀티 부팅 화면에서 바로 부팅이 돼요. 하지만 기본 부팅 항목 외의 다른 부팅 항목은 선택하면 시스템이 한 번 재부팅된 후 최종적으로 부팅이 되죠. 이게 모든 경우에 그런 것인지 정확하게 모르겠지만 제 경우엔 그렇더라고요.
아무튼, 이런게 원래 그런 거라고 치면 기본 부팅 항목 외의 다른 부팅 항목을 선택했을 때는 시스템이 재부팅된 후 다시 한 번 USB 외장 하드로 부팅을 선택해줘야 합니다. [메인보드 펑션키를 통한 부트 메뉴를 활용하는 경우] 만약 시스템이 재부팅된 후에 멍 때리고 있으면 로컬 윈도우로 부팅이 진행되어 버리겠죠. 잊지 마세요.
이런 식으로 멀티 부팅이 가능하기 때문에 PE 부팅 항목을 멀티 부팅에 등록하는 것도 가능합니다. 이는 윈도우 설치 DVD 도 부팅 항목으로 추가하는 게 가능하다는 거죠. 일단 윈도우 8 설치 DVD 를 기준으로 놓고 설명할께요.
윈도우 8 설치 DVD 에서 [Sources] 폴더를 통채로 WTG 가 설치된 USB 외장 하드의 루트로 복사합니다. [일단 다른 폴더나 파일들은 필요없습니다.]

이제 다음으로 윈도우 8 설치 DVD 의 [Boot] 폴더에서 boot.sdi, bootsect.exe 두 파일을 USB 외장 하드의 [Boot] 폴더로 복사합니다. 반드시 두 파일만 복사하세요. [Boot] 폴더를 통채로 복사하시면 안 됩니다. [Bootsect.exe 는 사실 없어도 되지만 아쉬우니 넣었습니다.]

자~ 윈도우 8 설치의 부팅 항목 구성은 기본적으로 아래와 같습니다.

이걸 그대로 넣어주면 됩니다. 다만 ramdisk 장치 항목이 {7619dcc8-fafe-11d9-b411-000476eba25f} 인데 어차피 이걸 동일하게 전용으로 구성할 필요는 없죠. 그러니 해당 항목은 {ramdiskoptions} 로 구성하도록 하고, device 와 osdevice 에서 사용된 Boot 경로도 그대로 사용해도 되지만 그냥 USB 외장 하드 드라이브 경로로 설정하도록 하겠습니다. 다른 부팅 항목들도 그렇게 설정되어 있으니 그렇게 하도록 하죠. 우리의 소원은 통일이니까요.
관리자 권한으로 명령 프롬프트를 실행한 후 다음의 작업을 진행하시면 됩니다.
bcdedit /store G:\Boot\bcd /set {ramdiskoptions} ramdisksdidevice partition=G:
bcdedit /store G:\Boot\bcd /set {ramdiskoptions} ramdisksdipath \Boot\boot.sdi
bcdedit /store G:\Boot\bcd /create /d "Windows 8 Setup" /application osloader
└ 이후 명령에서의 {GUID} 는 해당 단계에서 출력된 식별자를 의미
bcdedit /store G:\Boot\bcd /set {GUID} device ramdisk="[G:]\sources\boot.wim,{ramdiskoptions}"
bcdedit /store G:\Boot\bcd /set {GUID} osdevice ramdisk="[G:]\sources\boot.wim,{ramdiskoptions}"
bcdedit /store G:\Boot\bcd /set {GUID} path \windows\system32\winload.exe
bcdedit /store G:\Boot\bcd /set {GUID} systemroot \Windows
bcdedit /store G:\Boot\bcd /set {GUID} locale en-US
bcdedit /store G:\Boot\bcd /set {GUID} inherit {bootloadersettings}
bcdedit /store G:\Boot\bcd /set {GUID} bootmenupolicy standard
bcdedit /store G:\Boot\bcd /set {GUID} detecthal Yes
bcdedit /store G:\Boot\bcd /set {GUID} winpe Yes
bcdedit /store G:\Boot\bcd /set {GUID} ems No
bcdedit /store G:\Boot\bcd /displayorder {GUID} /addlast
명령을 일일히 입력하는 게 귀찮은 것 빼고는 그냥 윈도우 8 설치 기본과 동일하게 입력하면 되기에 그리 어려운 내용은 없으실 겁니다. 아무튼 이 내용은 윈도우 7 의 부팅 - 하드 디스크에서 윈도우 PE 사용하기(윈도우 PE 부팅 항목 구성하기) [BCDEdit.exe] 글에서 설명했던 작업과 동일한 겁니다. 단지 대상을 시스템 BCD 가 아닌 USB 외장 하드로 지정해주는 것과 윈도우 8 설치 부팅 항목에 맞춰서 bootmenupolicy 항목만 추가된거죠. 그 외에는 모두 똑같습니다.
근데 위와 같이 일일히 작업하지 마시고 그냥 아래와 같은 배치 파일을 하나 만드신 후 USB 외장 하드 루트에 넣고 관리자 권한으로 실행하세요. 이거 원 제가 적으면서도 너무 길어서 열 받으니 작업하실 때는 더 열 받으실 것 같네요;;; 그냥 아래 배치 파일로 편하게 작업하세요. 우리의 혈압은 소중하니까요.
setlocal enabledelayedexpansion
pushd %~dp0
set WTG=%~d0
bcdedit /store %WTG%\Boot\bcd /create {ramdiskoptions}
bcdedit /store %WTG%\Boot\bcd /set {ramdiskoptions} ramdisksdidevice partition=%WTG%
bcdedit /store %WTG%\Boot\bcd /set {ramdiskoptions} ramdisksdipath \Boot\boot.sdi
bcdedit /store %WTG%\Boot\bcd /create /d "Windows 8 Setup" /application osloader > guid.txt
for /f "tokens=1-5 delims=-" %%a in (guid.txt) do (
set fst=%%a
set lst=%%e
set GUID=!fst:~-9!-%%b-%%c-%%d-!lst:~0,13!
)
bcdedit /store %WTG%\Boot\bcd /set %GUID% device ramdisk="[%WTG%]\sources\boot.wim,{ramdiskoptions}"
bcdedit /store %WTG%\Boot\bcd /set %GUID% osdevice ramdisk="[%WTG%]\sources\boot.wim,{ramdiskoptions}"
bcdedit /store %WTG%\Boot\bcd /set %GUID% path \windows\system32\winload.exe
bcdedit /store %WTG%\Boot\bcd /set %GUID% systemroot \Windows
bcdedit /store %WTG%\Boot\bcd /set %GUID% locale en-US
bcdedit /store %WTG%\Boot\bcd /set %GUID% inherit {bootloadersettings}
bcdedit /store %WTG%\Boot\bcd /set %GUID% bootmenupolicy standard
bcdedit /store %WTG%\Boot\bcd /set %GUID% detecthal Yes
bcdedit /store %WTG%\Boot\bcd /set %GUID% winpe Yes
bcdedit /store %WTG%\Boot\bcd /set %GUID% ems No
bcdedit /store %WTG%\Boot\bcd /displayorder %GUID% /addlast
del guid.txt /q
cls
bcdedit /store %WTG%\Boot\bcd /enum %GUID%
echo.
pause
exit


그럼 아래와 같이 윈도우 8 설치가 부팅에 등록됩니다. 역시나 기본 부팅 항목이 아니기 때문에 선택하면 한 번 재부팅되고 다시 USB 외장 하드로 부팅을 지정해주면 이후 곧바로 윈도우 설치로 진입합니다. [화질 구린건 피쳐폰 폰카 중에서도 핀트 안 맞기로 유명한 주름폰이라 이해를...]


근데 WTG 를 사용한다면 굳이 이렇게 윈도우 설치 DVD 를 부팅에 담아서 사용할 일은 많이 없을 것으로 생각되네요. 왜냐하면 그냥 ImageX 랑 Install.wim 이미지 파일만 가지고 다니면서 WTG 윈도우 상에서 직접 풀어서 설치하는 방법을 사용하면 될테니까요. 그래서 그에 관련된 배치 파일을 하나 짜두면 굉장히 편리하겠죠? 해당 배치 파일을 짜는 건 나중에 정식 버전이 나오면 생각해보도록 하죠.
아무튼 그렇다고 할 지라도 이런 기본 설치가 언제 필요할 지 모르는 것이고 또한 다른 PE(WIM 이미지) 를 부팅에 등록하여 사용하는데에도 참고할 수 있으니 적어 봤습니다. 도움이 되셨을 지 모르겠네요.
이번 글은 이쯤에서 마치도록 하겠습니다. 이상입니다. ^^

글
Black Berry Fuel Case 블랙베리 배터리 내장 홀스터 케이스 입니다.
3일은 끄떡 없이 사용되네요...

글
구글어스( Google Earth)로 네비게이션을 사용 해볼까?
구글어스( Google Earth)로 네비게이션을 사용 해볼까?
일단, 일반 구글어스 즉 배포판은 GPS 연동을 막아 놓은 관계로 외부 GPS 를 사용 할 수 없습니다.
저는 20$ 주고 1년 플러스 사용권을 구매를 했습니다.
업무상 필요해서리…
그리고 GPS Receiver는 NCS NAVI R120+ Bluetooth GPS를 사용 하였습니다.
그런데 구글어스에서 지원하는 수신기는 설정해 보신분들은 아시겠지만
딱 두개회사에서 나온것만 지원하므로(GARMIN, Magellan) 다음과 같은 에뮬레이터를 써서
구글어스랑 수신기의 데이터를 맞추어야 한다. 저는 Franson GPSGATE라는 프로그램을 사용하였다.
Setup에가서 Input 항목에서 수신기를 노트북에 연결한뒤 Setup Wizard를 실행하면 자동으로
연결되고 그림에서 빨간색 아이콘이 녹색으로 바뀌면 정상적으로 수신기와 연결이 된것이다.

Output 설정은 각자의 노트북환경에 맞게 자동으로 설정되지만 수동으로 Google Earth는
설정을 추가해 주어야 한다. 이것을 하지 않으면 구글어스를 실행해도 연동이 되지 않는다.
나머지 설정은 각자의 취향에 맞게 설정하시면 됩니다.
화면 캡처: 2008-10-30, 오후 9:01

아래와 같이 구글어스를 띄우시면 "위치" 항목에 Realtime GPS항목이 자동으로 생성되며 자기위치를
GPS 수신기에서 받아 위성사진에 표시를 하게 된다.
하지만 우리나라 지도는 아직 일본이나 미국과 같이 고해상 정보를 지원하고 기타 정보를 일반네비게이션 프로그램 만큼
지원은 하지 않고 있는 관계로 네비로 이용은 아직 한계가 있습니다.
앞으로 더 많은 지원이 되길 기원 하며….
구글어스야! 근데 좀 공짜로 안되겠니? 아직까지 써비스도 그저 그런데 한국은 좀 깍아 주던가 아님 무료 하던가…

글
터보 메모리 레디부스트 활성화 하기(Turbo Memory ReadyBoost)
터보 메모리 레디부스트 활성화 하기(Turbo Memory ReadyBoost)
본인의 컴퓨터(ThinkPad T61)에 터보메모리가 장착되어 있는데 레디 드라이브는 활성화 되고 레디 부스트는
활성화 되지 않거나 에러가 나서 다시 설정이 되지 않는 다면 다음과 같이 해 보시길 권합니다.

화면 캡처: 2008-10-10, 오전 4:38
아래와 같이 제어판에 컴퓨터 관리에 가서 보면 1G 터보메모리 라면 아래와 같이 513MB 디스크가 보일것이다.
그 디스크를 볼륨을 할당하고 파티션을 잡은 후 포맷을 하고 다시 할당을 삭제하면 그 뒤부터는 레디 부스트가 가능하다고
위의 화면과 같이 나올 것이다.
저도 레디 부스트가 설정이 되지 않아 고민했는데 아주 쉬게 해결 할 방법이 있었더군요.
이 문제로 고민 하시던 분들께 조금이나마 도움이 되었길….

글
SATA HDD 설정하기
SATA HDD 설정하기
S-ATA 하드드라이브를 설치한 후 BIOS에서도 설정을 하였는데 보이지 않고 또 예전처럼 Fdisk 라는 프로그램을 사용해서 파티션을 잡을려고
해도 VISTA에는 fdisk가 없다. 그런데 비스타에는 파티션과 포맷을 할 수 있는 메뉴가 숨겨져 있는데 바로 아래와 같이 실행 하시면 됩니다
먼저 각자의 BIOS 셋업에 들어가서 SATA enable 설정을 한뒤 아래와 같이 진행 하시면 부팅 디스크나 CD 없이 바로 HDD를 사용 하실 수 있습니다..
저는 울트라 베이 SATA adapter 를 사용해 아래 그림과 같이 Thinkpad t61의 ODD를 빼내고 옵션인 Ultrabay S-ATA 하드드라이브 옵션을 꽃은 후 제어판의 컴퓨터관리 --> 디스크관리
항목에서 보면 하드드라이브가 보이며 새로 넣은 하드드라이브에서 마우스 우클릭하면 파티션하기가 나오고 파티션이 끝나면 포맷하기를 선택하여 포맷을 완료 한 후 원도우 탐색기에서 보시면 드라이브가 보이실 것입니다.

꼭 파티션과 포맷은 필수 입니다.

그래야 하드 드라이브를 정상적으로 사용이 가능 합니다.
물론 쓰시던 하드는 파티션과 포맷이 이미되어 있으니 하실 필요는 없겠죠.
하지만 새로 구입한 하드는 꼭 위와 같은 과정을 거쳐야만 사용이 가능합니다.
님들에게 도움이 되었길….
글
BIOS Upgrade ThinkPad X- 시리즈 USB Boot Disk 만들기
BIOS Upgrade ThinkPad X- 시리즈 USB Boot Disk 만들기
저는 X61t Tinkpad 를 쓴지는 몇개월 안되지만 쓸수록 디자인이나 기능에 만족을 하고 있습니다.
전에 LG Xnote를 사용했었는데 그게 더 사양이 좋음에도 불구하고 이눔의 검댕이를 더 선호 하는것은 아마도 씽크패드를 써보신 분들은 공감을 하실 겁니다.
그런데 한가지 불만인 것은 레노버로 씽크패드가 넘어가면서 레노버의 서비스등에 대한 아쉬운 그런 부분일 것이다.
그럼 왜 이 글을 쓰게 되었냐 하면 BIOS 업뎃을 하려고 레노버 홈피에 들어가 보았더니 아주 잘 안내가 되어 있었는데 문제는 VISTA x64 사용자는 올려져 있는 바이오스 업뎃 실행파일로는 업뎃이 안되고 CD 이미지 파일을 다운받아 구워서 해야 된단다. 거기까지는 머 그런가 했습니다. 왜냐면 저는 외장형 ODD(Optical Disk Drive) 를 USB 타입으로 얼마 전 구매를 했기 때문이당
그런데 참고 문서를 읽던 중에 허거덩~~ 업뎃이 가능한 ODD는 DMA를 지원하는 씽크패드 울트라베이용 ODD에서만 가능 하단다. 그럼 난 머양? 한참을 고민하다가 함 CD 구워서 그래도 해 봐야지 하고 만들어 실행을 해보니 역쉬 부팅은 되나 머 없다 안되고, 역쉬 레노버 애덜이 괜히 써놓은 말이 아니구나 하고 좌절…. 그렇다고 바이오스 업뎃을 위해 OS를 다운그레이드 한뒤 다시 비스타 64로 바꾸기도 정말 삽질이고 해서 방법이 없을까하고 인터넷 검색 그러다가 걸린게 USB 메모리로 가상하드 만들어 부팅하기였다. 그래서 다음 같이 시도를 해 보았다.
준비물
- USB 부팅 및 포맷 유틸
- USB 메모리스틱에 OS 만들 Windows 98에서 뽑아낸 Boot 시스템 파일들
- 레노버 싸이트에서 자기 노트북에 맞는 BIOS ISO파일을 다운로드 한다.
http://www-06.ibm.com/jp/domino04/pc/support/beginner.nsf/document/TPAD-MATRIX-KR - USB 메모리 스틱 5Mbytes 이상되는것(저는 2G짜리 사용했음)
-
버추얼 cd 드라이버 프로그램 (데몬시디,매직디스크 등 각자 쓰고 계시는거 아무거나 컴에 깔려 있음됨)
실행절차
- 먼저 USB 부팅 및 포맷 유틸 압축 풀어 인스톨하면 c:\dirvekey 리고 폴더가 생성될 것이다.
- 그리고 제가 올린 windows98 boot files을 다운받아 압축을 풀어 C:\98boot 라고 폴더 만들어 그 폴더에 복사
- 레노버에서 다운 받은 각자의 BIOS 업데이트 이미지 파일을 가상시디에 불러 올린다.(이때 가상시디 드라이브가 D: 인지 E: 인지 머인지 꼭 확인해 둘 것)
- 윈도우 시작버튼 누르고 --> 보조프로그램 --> 명령 프롬프트 선택하면 도스창이 뜬다.
- 그리고 USB 메모리를 꽂는다. (이것도 드라이브 명하고 라벨네임 확인할것)
- 도스창에 "cd c:\drivekeyt" 라고 치고 엔터 그럼 c:\drivekey 디렉토리로 갈 것이당.
- 거기서 "hpusbf.exe G: -B:C:\98boot" 치시고 엔터 그럼 메시지 뜨면서 물어보면 무조건 yes 그리고 저는 USB 드라이브가 G: 여서 G로 명령에 넣었는데 여러분들 각자의 USB드라이브 위치를 넣어 주심됩니다.
- 그리고 중간에 포맷전에 현재 드라이브 label 이 머냐고 물어 봅니다. 거기에 현재 USB 드라이브 라벨을 입력 하심 됩니다. 그런데 이건 미리 윈도우 탐색기를 사용해 스페이스 없이 가급적 짧게 이름을 만들어 주심이 좋습니다.
- 그럼 완료 했다고 나오고 완료되면 "cd c:\98boot" 하고 엔터 치면 98boot 리렉토리로 갑니다.
- 거기서 "copy *.* G:"하고 엔터(아까 설명 드렸듯 G:는 각자의 USB 드라이브 입니다.) 이 명령 실행후 겹치는 파일 다시복사 할까요 나오면 무조건 No 입니다.
- 그리고 "copy E:\*.* G:" 하고 엔터 여기서 E:는 가상시디롬 드라이브 입니다.
- 이렇게 하시고 노트북 다시 시작해서 레노보 고로 뜰때 F12 키 겁나 누르면 화면에 부팅드라이브 순서 정하는 화면 나옵니다. 여기서 "-USB HD" 라고 되어 있는 항목 맨 위로 올립니다. 물론 USB 메모리 꽂은 상태이어야 합니다.
- 잠시 기다리면 도스화면 뜰 겁니다. 그럼 성공한 겁니다.
- 그럼 "UPDTFLSH.EXE" 라고 치면 도스화면 하나 뜰 겁니다. 거기서 질문을 하는데 무조건 yes 랑 엔터 치고 진행하면 마지막 가서 화면 한 1~3분 정도 정지해 있으면서 업데이트 중이라 나옵니다.
-
여기 까지 하면 끝입니다. 확인은 바이오스 셋업가서 확인하시면 됩니다. 가급적 설명을 초보분들도 쉽게 알 수 있도록 설명을 드렸는데 중요한 것은 꼭 전원을 연결해 놓고 하십시오. 중간에 전원나가면 센터로 가셔야 할 겁니다. 그리고 제가 설명해 놓은 것 따라 하시고 발생하는 모든 책임은 각자에게 있다는 걸 명심하십시오. 그럼 즐거운 날 되십시오.
글
BIOS Upgrade/X Series - ThinkPad
BIOS Upgrade/X Series
Contents
- 1 Approach 1: Use larger boot image and create virtual CD drive
- 1.1 Comments on Approach 1
- 2 Approach 2: Load an USB driver, create RAM disk and copy the files to the RAM disk
- 2.1 Comments on Approach 2
- 3 Approach 3: Alternative method using a USB stick
- 4 Approach 4: Alternative method to the above "alternative method"
- 4.1 Comments on Approach 4
- 5 Approach 5: Free Alternative method to the above "alternative method"
-
X Series Thinkpads do not have an internal drive. If there is no Windows installed, the BIOS must be updated by booting from an USB drive or a drive that is integrated in the docking station. Since a while Lenovo provides BIOS updates in form of bootable CD images. Unfortunately, these images are intended to be used with the docking station's CD drive. If you do not own such a drive, things get complicated.
The problem is that current BIOS updates are quite large, about 3 MB in size. Booting from CDs typically works like booting from a 1.44 MB or 2.88 MB floppy disk. The floppy image is stored on the CD and is referenced in the CD's boot record. Because the BIOS update file are that large, they do not fit on such a floppy image. Thus, they must be stored on the CD outside the virtual floppy image. To access these files a driver for the CD drive has to be loaded. Since Lenovo's CD images are intended to be used with a docking station's CD drive, it is not possible to use them for BIOS updates by booting from an USB CD drive.
Another problem is that older X Series (like the X32) don't have bootable iso images at all. They have only two options: 1. update from Windows, 2. update using a diskette updater, which requires you to have a real floppy disk drive.
But there is hope. This page describes some approaches to solve the problems above.
Here is a brief overview of each approach:
- #Approach 1: Use larger boot image and create virtual CD drive
Requires a USB CD drive. Reported to work on X60s. - #Approach 2: Load an USB driver, create RAM disk and copy the files to the RAM disk
Requires a USB CD drive. People have reported mixed results, with the flash update software freezing, depending on things like CD drive letter and type. Reported to work on X60s. - #Approach 3: Alternative method using a USB stick
Requires a USB flash drive, Microsoft Windows, and some HP software tool. Reported to work on X60s, X61. - #Approach 4: Alternative method to the above "alternative method"
Requires a USB flash drive, Microsoft Windows, and some HP software tool. Seems functionally similar to Approach 3. - #Approach 5: Free Alternative method to the above "alternative method"
Requires a USB flash drive, does not require MS Windows or any proprietary software. -
#Approach 6: Using a USB stick to upgrade BIOS on older X Series Thinkpads
Requires a USB flash drive. Reported to work on X32.Approach 1: Use larger boot image and create virtual CD drive
The CD images provided by Lenovo can be modified such that a BIOS update is possible -- without loading any drivers. I (Joachim Selke) successfully updated my Thinkpad X60s using the following method.
My first idea was to take Lenovo's ISO CD image and modify it such that a USB CD drive can be used instead the CD drive in the docking station. Unfortunately, simply replacing the drivers is not enough. While doing the BIOS update, the USB ports seem to get disabled or something like that. To circumvent this problem I tried to create a RAM disk, copy the needed files to this RAM disk, and then use this RAM disk as some kind of virtual CD drive. However, there were some problems with this approach as reported below. For a description of this old approach see the section "Approach 2: Load an USB driver, create RAM disk and copy the files to the RAM disk" below. I developed a new approach to solve this problem and will describe it here.
The idea is to create a new bootable ISO image that is large enough to hold the original ISO file. This can be done by switching from the virtual floppy drive used by Lenovo's update disk to a virtual hard disk drive (for details, see the El Torito standard). Instead of loading the CD drive driver provided by Lenovo we load the [SHSUCD drivers]. This driver enables us to create a virtual CD drive from Lenovo's original ISO file.
I wrote a script to automate this steps and create a new ISO file from Lenovo's ISO file. This new ISO file can directly be used to update the BIOS. My script takes four arguments:
- the filename of Lenovo's original ISO file (e.g. /home/selke/Desktop/7buj23uc.iso)
- the filename of the new ISO file to be created (e.g. /home/selke/Desktop/out.iso)
- the location of shsucdrd.exe (e.g. /home/selke/Desktop/shsucdrd.exe
-
the location of shsucdx.com (e.g. /home/selke/Desktop/shsucdx.com
Both shsucdrd.exe and shsucdx.com can be downloaded from [1].
To sum up, an example call of the script would be convertlenovo.sh /home/selke/Desktop/7buj23uc.iso /home/selke/Desktop/out.iso /home/selke/Desktop/shsucdrd.exe /home/selke/Desktop/shsucdx.com
Note that you need recent versions of the following tools:
- mkdosfs (for Fedora users: contained in the package dosfstools)
-
mkisofs
The script runs perfectly on my Fedora 8 system (it should also run without problems on Fedora 7 and other popular distributions). If there are problems, please tell me (Joachim Selke).
Further note that the script at some point requires you to enter the root password since it must mount a disk image. As far as I know, this cannot be done without root privileges.
What does the script do? I will give a short overview:
- Extract the boot floppy image from Lenovo's bootable ISO file.
- Create a new boot hard disk image and copy both the boot sector and the files from Lenovo's boot floppy image to the new image.
- Copy Lenovo's ISO image to the new hard disk image.
- Also copy the SHSUCD drivers to the hard disk and change autoexec.bat and config.sys accordingly. When booting this hard disk image a new virtual CD drive will be created by SHSUCD. This virtual CD drive will have Lenovo's original ISO disc "inserted."
-
Create a new ISO file that only consists of the boot image given by the bootable hard disk image just created.
Some additional notes:
- Currently, the script is not able to handle spaces in file names properly. Thus, the file names and directory path names used when calling the script should not contain spaces.
-
The file name of the original ISO file (7buj23uc.iso in the example above) must follow the DOS 8.3 file name conventions; otherwise SHSUCD will not be able to load the ISO image.
Here is the complete script (save it as convertlenovo.sh):
#!/bin/bash
# Written by Joachim Selke (mail@joachim-selke.de), 2007-12-28
# Known bugs:
# - spaces in file names make trouble at the moment (so try to avoid spaces),
# I will fix that later
# - some users seem to have problems with some of the sed statements,
# I currently have no idea what is wrong there ... (please report those bugs)
CDIMAGE=$1 # location of Lenovo's CD image
NEWCDIMAGE=$2 # filename of ISO file to create
SHSUCDRD_EXE=$3 # location of shsucdrd.exe
SHSUCDX_COM=$4 # location of shsucdx.com
MB_HDD=50 # HDD image size in megabyte (base 1000)
TMPDIR=`mktemp -d`
ISODIR=`mktemp -d`
HDDIMG=$ISODIR/hdd.img # filename of HDD image to create
FLOPPYIMG=$TMPDIR/floppy.img # filename of floppy image to create
##############################################################################
# This script extracts the floopy boot image from bootable ISO images
#
# Written by Joachim Selke (mail@joachim-selke.de), 2007-04-07
ISOFILE=$CDIMAGE
IMAGEFILE=$FLOPPYIMG
if [ ! -r $ISOFILE ]; then
echo $ISOFILE: file does not exist or is not readable
exit 1
fi
if [ -z $IMAGEFILE ]; then
echo Error: no image file specified
exit 1
fi
ISOFILESIZE=`stat -c %s $ISOFILE`
# collect El Torito data
# see http://www.phoenix.com/NR/rdonlyres/98D3219C-9CC9-4DF5-B496-A286D893E36A/0/specscdrom.pdf for reference
BOOTCATALOGPOINTERBYTE=$((17 * 0x800 + 0x47))
if [ $ISOFILESIZE -lt $(($BOOTCATALOGPOINTERBYTE + 4)) ]; then
echo ISO file is too short, possibly damaged
exit 1
fi
# absolute pointer to first sector of boot catalog:
BOOTCATALOG=`od -A n -t x4 -N 4 -j $BOOTCATALOGPOINTERBYTE $ISOFILE | tr -d [:blank:]`
BOOTCATALOGBYTE=$((0x$BOOTCATALOG * 0x800))
echo Boot catalog starts at byte $BOOTCATALOGBYTE
if [ $ISOFILESIZE -lt $(($BOOTCATALOGBYTE + 32 + 2)) ]; then
echo ISO file is too short, possibly damaged
exit 1
fi
# media type of boot image
# only floppy disk images are supported by this script
BOOTMEDIATYPE=`od -A n -t x1 -N 1 -j $(($BOOTCATALOGBYTE + 32 + 1)) $ISOFILE | tr -d [:blank:]`
if [ $BOOTMEDIATYPE -eq 1 ]; then
echo Boot media type is 1.2M floppy disk
IMAGEBLOCKS=$((1200 / 2))
elif [ $BOOTMEDIATYPE -eq 2 ]; then
echo Boot media type is 1.44M floppy disk
IMAGEBLOCKS=$((1440 / 2))
elif [ $BOOTMEDIATYPE -eq 3 ]; then
echo Boot media type is 2.88M floppy disk
IMAGEBLOCKS=$((2880 / 2))
else
echo Boot media type is $((0x$BOOTMEDIATYPE)). This type is not supported yet.
exit 1
fi
# absolute pointer to start of boot image
BOOTIMAGE=`od -A n -t x4 -N 4 -j $(($BOOTCATALOGBYTE + 32 + 8)) $ISOFILE | tr -d [:blank:]`
BOOTIMAGEBYTE=$((0x$BOOTIMAGE * 0x800))
echo Boot image starts at byte $BOOTIMAGEBYTE
if [ $ISOFILESIZE -lt $((0x$BOOTIMAGE * 0x800 + $IMAGEBLOCKS * 0x800)) ]; then
echo ISO file is too short, possibly damaged
exit 1
fi
echo Extracting boot image ...
dd if=$ISOFILE of=$IMAGEFILE bs=2K count=$IMAGEBLOCKS skip=$((0x$BOOTIMAGE))
echo Finished
##############################################################################
NO_HEA=16 # heads
NO_SECT=63 # sectors per cylinder/track
B_SECT=512 # bytes per sector
B_CYL=$(($NO_HEA * $NO_SECT * $B_SECT)) # bytes per cylinder/track
NO_CYL=$(($MB_HDD * 1000 * 1000 / $B_CYL)) # cylinders/tracks per head
echo -n -e "Cylinders: $NO_CYL\nHeads: $NO_HEA\nSectors per track: $NO_SECT\nBytes per sector: $B_SECT\n"
echo Creating empty image ...
dd if=/dev/zero of=$HDDIMG bs=$B_CYL count=$NO_CYL >/dev/null 2>&1
echo Creating partition structure ...
echo -n -e "o\n n\n p\n 1\n \n \n t\n 6\n a\n 1\n w\n" | /sbin/fdisk -b $B_SECT -C $NO_CYL -H $NO_HEA -S $NO_SECT $HDDIMG >/dev/null 2>&1
echo Writing master boot record ...
echo -n -e "\
\xFA\xB8\x00\x10\x8E\xD0\xBC\x00\xB0\xB8\x00\x00\x8E\xD8\x8E\xC0\
\xFB\xBE\x00\x7C\xBF\x00\x06\xB9\x00\x02\xF3\xA4\xEA\x21\x06\x00\
\x00\xBE\xBE\x07\x38\x04\x75\x0B\x83\xC6\x10\x81\xFE\xFE\x07\x75\
\xF3\xEB\x16\xB4\x02\xB0\x01\xBB\x00\x7C\xB2\x80\x8A\x74\x01\x8B\
\x4C\x02\xCD\x13\xEA\x00\x7C\x00\x00\xEB\xFE\x00\x00\x00\x00\x00\
\x00\x00\x00\x00\x00\x00\x00\x00\x00\x00\x00\x00\x00\x00\x00\x00\
\x00\x00\x00\x00\x00\x00\x00\x00\x00\x00\x00\x00\x00\x00\x00\x00\
\x00\x00\x00\x00\x00\x00\x00\x00\x00\x00\x00\x00\x00\x00\x00\x00\
\x00\x00\x00\x00\x00\x00\x00\x00\x00\x00\x00\x00\x00\x00\x00\x00\
\x00\x00\x00\x00\x00\x00\x00\x00\x00\x00\x00\x00\x00\x00\x00\x00\
\x00\x00\x00\x00\x00\x00\x00\x00\x00\x00\x00\x00\x00\x00\x00\x00\
\x00\x00\x00\x00\x00\x00\x00\x00\x00\x00\x00\x00\x00\x00\x00\x00\
\x00\x00\x00\x00\x00\x00\x00\x00\x00\x00\x00\x00\x00\x00\x00\x00\
\x00\x00\x00\x00\x00\x00\x00\x00\x00\x00\x00\x00\x00\x00\x00\x00\
\x00\x00\x00\x00\x00\x00\x00\x00\x00\x00\x00\x00\x00\x00\x00\x00\
\x00\x00\x00\x00\x00\x00\x00\x00\x00\x00\x00\x00\x00\x00\x00\x00\
\x00\x00\x00\x00\x00\x00\x00\x00\x00\x00\x00\x00\x00\x00\x00\x00\
\x00\x00\x00\x00\x00\x00\x00\x00\x00\x00\x00\x00\x00\x00\x00\x00\
\x00\x00\x00\x00\x00\x00\x00\x00\x00\x00\x00\x00\x00\x00\x00\x00\
\x00\x00\x00\x00\x00\x00\x00\x00\x00\x00\x00\x00\x00\x00\x00\x00\
\x00\x00\x00\x00\x00\x00\x00\x00\x00\x00\x00\x00\x00\x00\x00\x00\
\x00\x00\x00\x00\x00\x00\x00\x00\x00\x00\x00\x00\x00\x00\x00\x00\
\x00\x00\x00\x00\x00\x00\x00\x00\x00\x00\x00\x00\x00\x00\x00\x00\
\x00\x00\x00\x00\x00\x00\x00\x00\x00\x00\x00\x00\x00\x00\x00\x00\
\x00\x00\x00\x00\x00\x00\x00\x00\x00\x00\x00\x00\x00\x00\x00\x00\
\x00\x00\x00\x00\x00\x00\x00\x00\x00\x00\x00\x00\x00\x00\x00\x00\
\x00\x00\x00\x00\x00\x00\x00\x00\x00\x00\x00\x00\x00\x00\x00\x00\
\x00\x00\x00\x00\x00\x00\x00\x00\x52\xF9\x06\x00\x00\x00\
" | dd of=$HDDIMG bs=1 conv=notrunc >/dev/null 2>&1
echo Creating primary partition ...
# extract partition, create FAT16 filesystem and copy back
PARTFILE=${HDDIMG}-PARTITION
SECT_PARTTABLE=$NO_SECT
B_PARTTABLE=$(($SECT_PARTTABLE * $B_SECT))
dd if=$HDDIMG of=$PARTFILE bs=$B_SECT skip=$SECT_PARTTABLE >/dev/null 2>&1
/sbin/mkdosfs -F 16 -h $NO_SECT $PARTFILE
# Correct physical drive number (set to 0x00, should be 0x80)
echo -n -e "\x80" | dd of=$PARTFILE bs=1 seek=36 conv=notrunc >/dev/null 2>&1
# Correct sectors per track (set to 0x0020, should be $NO_SECT)
NO_SECT_HEX1=$(echo "ibase=10; obase=16; $(($NO_SECT / 256))" | bc)
NO_SECT_HEX2=$(echo "ibase=10; obase=16; $(($NO_SECT % 256))" | bc)
NO_SECT_HEX=$(echo -n -e "\\x$NO_SECT_HEX2\\x$NO_SECT_HEX1")
echo -n -e $NO_SECT_HEX | dd of=$PARTFILE bs=1 seek=24 conv=notrunc >/dev/null 2>&1
dd if=$PARTFILE of=$HDDIMG bs=$B_SECT seek=$SECT_PARTTABLE >/dev/null 2>&1
rm -f $PARTFILE
# transfer floppy boot sector code
B_BOOTSECPARAM=62 # length of parameter block in boot sector
B_BOOTSECCODE=$(($B_SECT - B_BOOTSECPARAM)) # length of code block in boot sector
echo Copying boot sector ...
dd if=$FLOPPYIMG of=$HDDIMG bs=1 count=$B_BOOTSECCODE skip=$B_BOOTSECPARAM seek=$(($B_PARTTABLE + $B_BOOTSECPARAM)) conv=notrunc >/dev/null 2>&1
echo Copying DOS files ...
CDIMAGE_BASENAME=$(basename $CDIMAGE)
HDDDIR=$TMPDIR/hdd
FLOPPYDIR=$TMPDIR/floppy
su --command="\
mkdir $HDDDIR;\
mkdir $FLOPPYDIR;\
mount -oloop $FLOPPYIMG $FLOPPYDIR;\
mount -t msdos -oloop,offset=$(($SECT_PARTTABLE * $B_SECT)) $HDDIMG $HDDDIR;\
cp --preserve $FLOPPYDIR/ibmbio.com $HDDDIR;\
cp --preserve $FLOPPYDIR/ibmdos.com $HDDDIR;\
cp --preserve -u $FLOPPYDIR/* $HDDDIR;\
cp --preserve=timestamps $CDIMAGE $HDDDIR;\
cp --preserve=timestamps $SHSUCDRD_EXE $HDDDIR;\
cp --preserve=timestamps $SHSUCDX_COM $HDDDIR;\
cat $FLOPPYDIR/config.sys | \
sed -e 's/A:\\\/C:\\\/' | \
grep -v IBMTPCD.SYS >$HDDDIR/config.sys;\
cat $FLOPPYDIR/autoexec.bat | \
sed -e 's/LOADHIGH MSCDEX.EXE \/D:TPCD001/shsucdrd.exe \/f:$CDIMAGE_BASENAME\r\nshsucdx.com \/d:SHSU-CDR,R/' >$HDDDIR/autoexec.bat;\
umount $FLOPPYDIR;\
umount $HDDDIR;\
rm -rf $FLOPPYDIR;\
rm -rf $HDDDIR"
echo Creating ISO image ...
mkisofs -input-charset default -hard-disk-boot -b $(basename $HDDIMG) -hide boot.cat -hide $(basename $HDDIMG) -o $NEWCDIMAGE $ISODIR
rm -rf $TMPDIR
rm -rf $ISODIR
echo Completed!If you have any questions, feel free to ask. :-)
BTW: It would be much simpler if I simply could put the new ISO images for download somewhere. But I guess for legal reasons this will not be possible.
Comments on Approach 1
- Reported to work on:
- ThinkPad X60s (1702-55G) with Plextor PX-608CU USB DVD recorder
- ThinkPad X60 (1702-55G) with Plextor PX-608CU USB DVD recorder, upgraded BIOS from version 2.14 to 2.16
- ThinkPad X60 (1706-GMG) with Plextor PX-608CU USB DVD recorder, upgraded BIOS from version 2.03 to 2.14
-
ThinkPad X61s (7666-36G) with Freecom FS-50 USB DVD recorder, upgraded BIOS from version 1.10 to 2.07
Approach 2: Load an USB driver, create RAM disk and copy the files to the RAM disk
I ( Joachim Selke) successfully updated my Thinkpad X60s using the following method.
My first idea was to take Lenovo's ISO CD image and modify it such that a USB CD drive can be used instead the CD drive in the docking station. Unfortunately, simply replacing the drivers is not enough. While doing the BIOS update, the USB ports seem to get disabled or something like that. To circumvent this problem I tried to create a RAM disk, copy the needed files to this RAM disk, and then use this RAM disk as some kind of virtual CD drive. However, there were some problems with this approach as reported below.
- Download the ISO image style BIOS update from Lenovo's website. This file will be refered to as /tmp/bios-lenovo.iso.
- Extract the floppy image from this ISO image. You can use the following shell script for this task (or an alternative one from [2]). Simply save this code into the file /tmp/extractbootimage.sh, set the x-flag (chmod +x /tmp/extractbootimage.sh) and call it using the command /tmp/extractbootimage.sh /tmp/bios-lenovo.iso /tmp/bios-lenovo.img. The floppy image contained in the ISO image will then be saved to /tmp/bios-lenovo.img. Here is the code of the shell script:
#!/bin/bash
# This script extracts the floopy boot image from bootable ISO images
#
# Written by Joachim Selke (mail@joachim-selke.de), 2007-04-07
ISOFILE=$1
IMAGEFILE=$2
if [ ! -r $ISOFILE ]; then
echo $ISOFILE: file does not exist or is not readable
exit 1
fi
if [ -z $IMAGEFILE ]; then
echo Error: no image file specified
exit 1
fi
ISOFILESIZE=`stat -c %s $ISOFILE`
# collect El Torito data
# see http://www.phoenix.com/NR/rdonlyres/98D3219C-9CC9-4DF5-B496-A286D893E36A/0/specscdrom.pdf for reference
BOOTCATALOGPOINTERBYTE=$((17 * 0x800 + 0x47))
if [ $ISOFILESIZE -lt $(($BOOTCATALOGPOINTERBYTE + 4)) ]; then
echo ISO file is too short, possibly damaged
exit 1
fi
# absolute pointer to first sector of boot catalog:
BOOTCATALOG=`od -A n -t x4 -N 4 -j $BOOTCATALOGPOINTERBYTE $ISOFILE | tr -d [:blank:]`
BOOTCATALOGBYTE=$((0x$BOOTCATALOG * 0x800))
echo Boot catalog starts at byte $BOOTCATALOGBYTE
if [ $ISOFILESIZE -lt $(($BOOTCATALOGBYTE + 32 + 2)) ]; then
echo ISO file is too short, possibly damaged
exit 1
fi
# media type of boot image
# only floppy disk images are supported by this script
BOOTMEDIATYPE=`od -A n -t x1 -N 1 -j $(($BOOTCATALOGBYTE + 32 + 1)) $ISOFILE | tr -d [:blank:]`
if [ $BOOTMEDIATYPE -eq 1 ]; then
echo Boot media type is 1.2M floppy disk
IMAGEBLOCKS=$((1200 / 2))
elif [ $BOOTMEDIATYPE -eq 2 ]; then
echo Boot media type is 1.44M floppy disk
IMAGEBLOCKS=$((1440 / 2))
elif [ $BOOTMEDIATYPE -eq 3 ]; then
echo Boot media type is 2.88M floppy disk
IMAGEBLOCKS=$((2880 / 2))
else
echo Boot media type is $((0x$BOOTMEDIATYPE)). This type is not supported yet.
exit 1
fi
# absolute pointer to start of boot image
BOOTIMAGE=`od -A n -t x4 -N 4 -j $(($BOOTCATALOGBYTE + 32 + 8)) $ISOFILE | tr -d [:blank:]`
BOOTIMAGEBYTE=$((0x$BOOTIMAGE * 0x800))
echo Boot image starts at byte $BOOTIMAGEBYTE
if [ $ISOFILESIZE -lt $((0x$BOOTIMAGE * 0x800 + $IMAGEBLOCKS * 0x800)) ]; then
echo ISO file is too short, possibly damaged
exit 1
fi
echo Extracting boot image ...
dd if=$ISOFILE of=$IMAGEFILE bs=2K count=$IMAGEBLOCKS skip=$((0x$BOOTIMAGE))
echo Finished - Mount the floppy image as root using the loop device:
# mkdir /tmp/bios-lenovo.img-mnt
# mount -o loop /tmp/bios-lenovo.img /tmp/bios-lenovo.img-mnt
The image is now mounted as /tmp/bios-lenovo.img-mnt. - Download needed drivers. First download some USB drivers from Panasonic Japan. Save the file to /tmp/f2h_usb.exe This file is a self-extracting EXE file, that can be executed under Linux using Wine:
$ wine /tmp/f2h_usb.exe
You will be asked where to save the extracted files. Choose /tmp. A new directory /tmp/F2h containing the needed drivers will be created. Additionally, you will need drivers for the RAM disk mentioned. Download them from the ReSizeable RAMDisk project. Unzip them to /tmp/srdisk. - Let's modify the floppy image:
$ cp /tmp/F2h/Usbaspi.sys /tmp/bios-lenovo.img-mnt/
$ cp /tmp/F2h/USBCD.SYS /tmp/bios-lenovo.img-mnt/
$ cp /tmp/F2h/RAMFD.SYS /tmp/bios-lenovo.img-mnt/
$ cp /tmp/srdisk/srdxms.sys /tmp/bios-lenovo.img-mnt/
$ cp /tmp/srdisk/srdisk.exe /tmp/bios-lenovo.img-mnt/
Now add the following lines to /tmp/bios-lenovo.img-mnt/config.sys replacing the line DEVICE = A:\IBMTPCD.SYS /R /C:
DEVICE = A:\SRDXMS.SYS
DEVICE = A:\RAMFD.SYS
DEVICE = A:\USBASPI.SYS /V
DEVICE = A:\USBCD.SYS /D:TPCD001
Finally, edit the file /tmp/bios-lenovo.img-mnt/autoexec.bat replacing the last line (saying COMMAND.COM) by the following:
A:\SRDISK 10000
COPY *.* D:
D:
COMMAND.COM
Maybe the RAM disk gets a drive letter different from D: on your system. In this case, you have to change the above lines accordingly. - Unmount the floppy image (as root):
# umount /tmp/bios-lenovo.img-mnt - Copy the content of the original CD image to a new directory and create a new ISO file:
# mkdir /tmp/bios-lenovo.iso-mnt
# mount -o loop /tmp/bios-lenovo.iso /tmp/bios-lenovo.iso-mnt
$ mkdir /tmp/bios-new.iso-mnt
$ cp /tmp/bios-lenovo.iso-mnt/* /tmp/bios-new.iso-mnt
$ cp /tmp/bios-lenovo.img /tmp/bios-new.iso-mnt/boot.img
# umount /tmp/bios-lenovo.iso-mnt
$ mkisofs -relaxed-filenames -b boot.img -o /tmp/bios-new.iso /tmp/bios-new.iso-mnt/ -
The file /tmp/bios-new.iso is the modified ISO file. Just burn it to CD and use this CD for updating your BIOS (boot from it using your USB drive). Please give some comments here if it worked for you.
Comments on Approach 2
- I have followed your excellent instructions. The CD booted, the update program ran but stopped working and responding while updating. Luckily the BIOS was not destroyed. Since destroying the BIOS is a very high risk, I am going to recover the original Windows on an old HD and will run the update exe update program from there.
- I followed these clear instructions, and like the comment above I ended up with a CD that booted but the update program stopped working and responding. An ALT-CTRL-DELETE rebooted my x60s, and it works so the BIOS must not have been damaged. I was trying to upgrade from version 2.08 to 2.11, I wonder if these instructions are somehow particular to certain versions? Latch 01:22, 14 June 2007 (UTC)
- After following the above instructions, the program also stopped working while updating the BIOS. But after changing the drive letter from D: to C: (see code below), it everything worked fine. However, I had some trouble figuring out, which letter to choose over D: at first, as the BIOS Upgrade program started right away.
A:\SRDISK 10000
COPY *.* C:
C:
COMMAND.COM
Mtx, 1 August 2007, Thinkpad X61s- Flashing the bios (2.12) works for me on a X60s (using drive c). Using the DVD-R on an USB-Hub did not work.
Ra 00:15, 21 August 2007 (UTC)Flashing BIOS 2.14 works for me on a X60s (using drive c). 25-02-2008Approach 3: Alternative method using a USB stick
Note: none of the above methods worked on my X60s. This method worked for me, however. PhilipPaeps 16:41, 24 August 2007 (UTC)
This method was surprisingly painless once I convinced my ThinkPad X60s to boot DOS from a USB stick. I used VMWare and some mystical tool to get DOS on the stick. If you can find another way to get a bootable DOS stick, please update this section!
- Tell VMWare to create a virtual floppy image for you and format it under Microsoft Windows and tell it to create a system disk. You can do this by clicking into "My Computer", then right-clicking on the "Floppy" icon and selecting "Format". In the box that pops up, you need to check the box that says "Create an MS-DOS startup disk" and then click "Start".
- When you've done that, get this tool: http://www.techpowerup.com/downloads/330/mirrors.php and install it. The tool is apparantly something HP once wrote, but I have been unable to find a link to it anywhere on the HP website.
- In a command prompt again: C:\DriveKey\HPUSBF.EXE E: -Q -B:A:\, replacing the E: with the "drive letter" associated with your USB stick (you can find this letter in "My Computer" under "Removable Storage"). WARNING: this wipes anything on the USB stick. You will end up with a USB stick which appears empty at this point, but there is DOS on it somewhere.
Now mount the BIOS update ISO image from Lenovo as a virtual CDROM using VMWare again and copy the files from it to the USB stick: copy D:\*.* E:\.At this point, you may want to fiddle with the splash image, as described elsewhere on ThinkWiki.
- Reboot and press F12, tell the BIOS to boot from your USB stick.
cd flash ; updtflsh.exeThink happy thoughts. The ThinkPad will beep quite ominously (and loudly!) a couple of times. Do not let this worry you too much. After about three minutes, the program will ask you to press enter to restart and hopefully all will be well.
Approach 4: Alternative method to the above "alternative method"
This is based on the above "Alternative Method" and works on my X60.
1. Download the BIOS Update iso image and the USB Stick Formatter.
2. Now get access to Windows -- be it in an emulator, or a colleague's PC. Steps 3, 4, 5 needs Windows to complete.
3. Install the HP USB Stick Formatter.
4. Go to the directory where you installed the tool: e.g. C:\DriveKey and extract HPUSBF.EXE to a new directory HPUSBF\ (using WinRAR, 7zip or similar).
5. Run the HPUSBFW.EXE utility, selecting the location of system files as C:\DriveKey\HPUSBF, and let it format the USB stick.
6. Extract the iso image to the USB stick, for example to K:\7buj22us (K: being the USB stick).
7. On the target computer, boot with the USB stick and issue the commands "cd 7buj22us" then "command.com"
This brings up the BIOS flash interface and you can update your BIOS from here.
Comments on Approach 4
- I (Martin Aulbach) followed these clear instructions and updated my X61t (from BIOS v1.08 to v1.10) without any problems and with a nice graphic splash screen. It is not necessary to let Windows format the USB stick as a MS-DOS startup disk, as outlined in Approach 3. The HP format tool will take care of this (in Step 5) and the USB stick will boot sucessfully at startup (correct boot order provided).
This update to BIOS 2.14 worked on a brand-new X61s, 2008-06-27. (adsmith)Approach 5: Free Alternative method to the above "alternative method"
This is functionally equivalent to the above two "alternative methods", yet does not depend on MS Windows or any other proprietary software. It updates the BIOS through a bootable USB stick, and depends upon the FreeDOS, SYSLINUX, and AdvanceMAME projects. A detailed description is provided at [3].
Approach 6: Using a USB stick to upgrade BIOS on older X Series Thinkpads
This method has been successfully applied for upgrading an X32 Thinkpad. The previous BIOS version was 3.00d, and it was upgraded to 3.02 . Below are the steps:
1. Download the new BIOS and EC Diskette-type upgrades.
2. Make a DOS-bootable USB stick. See the section above for instructions on how to do this.
3. Copy the upgrade programs to the USB stick.
4. Make two zero-files (using dd), each with the size of a floppy disk.
5. Boot up the USB stick using QEMU, with the USB stick as hda, and the two floppy disk images as A: and B: .
6. Run the BIOS upgrade program, and select the first diskette as its destination. This will not actually upgrade the BIOS; it will only fill up the disk image.
7. Run the EC upgrade program, with the second diskette as target. Again, this will only fill up the disk image, not upgrade the EC.
8. Make two directories, C:\1 and C:\2 .
9. Copy the contents of the first diskette to C:\1 and the second diskette to C:\2 .
10. Exit QEMU, use the USB stick to boot the Thinkpad which BIOS we are going to upgrade.
11. cd into C:\1 and run command.com inside it. This will bring up the BIOS update interface, so update the BIOS.
12. After updating the BIOS, the machine will turn off by itself. Now boot again, with the same USB stick.
13. cd into C:\2 and run command.com inside it. This will bring up the EC update interface. Update the EC and wait for the machine to shut down completely.
14. Remove the USB stick. Now boot into the machine and go into BIOS setup. Right now you should see the new BIOS and EC version. If not, then something is wrong; make sure you have followed the above steps properly. Please also discuss this.
- Flashing the bios (2.12) works for me on a X60s (using drive c). Using the DVD-R on an USB-Hub did not work.
글
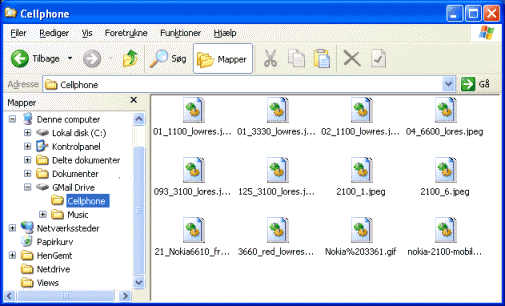
Gmail을 하드드라이브 같이 써보자..
각론하고 일단 gmail의 매력은 많은 용량을 주는 것이다. 요즘은 paran,yahoo등 메일 용량은 거의 마르고 닳토록
많이 주긴한다. 그런데 우리가 항상 아쉬은 것은 파일을 저장하고 올리기 쉬운 방법이 없을까 다들 한번씩은 생각해 보았을 것이다. 그런데 gmail은 그게 가능했다. 물론 인터넷 선구자들의 노력에 의해서 말이다. 다시 말해 정식적으로 gmail 서비스 하는 구글에서 한게 아니고 이걸 어떨게 편하게 사용해 볼까 연구한 사용자들이 만들어낸 프로그램이 있었다. 그런데 작년에 구글측에서 이것을 사용하지 못하게 막아 버리는 바람에 많은 사용자들이 아쉬움을 달랠수 밖에 없었다. 그런데 다시 올 여름 구글메일을 가상하드 드라이버로 사용가능하게 하는 프로그램이
업데이트 되었다.
 invalid-file
Gmail을 하드드라이브 같이...
우측에 첨부한 파일을 다운 받아 설치 한다.
설치시 비스타는 관리자권한으로 실해을 권장한다.
그렇게 설치하고 윈도우 탐색기를 다시 실행시킨후 아래 그림과 같이 폴더가 생성된것을
확인 하실수 있을 것이다. 옮기는 작업을 그냥 윈도우 탐색기 사용할 때와 같다. 넘 쉽죠...
하지만 테스트 해본 결과 많은 양의 파일을 올릴 시 겁나 시간이 오래 걸리는 단점이 있다.
시험으로 사진 폴더중 5Mbyte 정도되는 걸올릴때는 1분 정도 걸린것 같은데 204Mbyte 인 폴더를
올려보니 이글을 쓰고 있는 도중에도 계속 되고 있다. 그리고 얼마나 진행 됐는지에 대한 표시가
없는게 단점이다.
아 그리고 한가지더 이건 구글 정책에 따라 언제 또 구글에서 사용을 막을지 모른다.

Gmail Drive
아래는 원본이 개재된 블로그이다.
출처 --> http://www.viksoe.dk/code/gmail.htm
![]()
GMail Drive shell extension
GMail Drive creates a virtual filesystem on top of your Google Gmail account and enables you to save and retrieve files stored on your Gmail account directly from inside Windows Explorer. GMail Drive literally adds a new drive to your computer under the My Computer folder, where you can create new folders, copy and drag'n'drop files to.
Ever since Google started to offer users a Gmail e-mail account, which includes storage space of 6000 megabytes, you have had plenty of storage space but not a lot to fill it up with. With GMail Drive you can easily copy files to your Google Mail Account and retrieve them again.
When you create a new file using GMail Drive, it generates an e-mail and posts it to your account. The e-mail appears in your normal Inbox folder, and the file is attached as an e-mail attachment. GMail Drive periodically checks your mail account (using the Gmail search function) to see if new files have arrived and to rebuild the directory structures. But basically GMail Drive acts as any other hard-drive installed on your computer.
You can copy files to and from the GMail Drive folder simply by using drag'n'drop like you're used to with the normal Explorer folders.
Because the Gmail files will clutter up your Inbox folder, you may wish to create a filter in Gmail to automatically move the files (prefixed with the GMAILFS letters in the subject) to your archived mail folder.
Please note that GMail Drive is still an experimental tool. There's still a number of limitations of the file-system (such as total filename size must be less than 65 characters). Since the tool hooks up with the free Gmail Service provided by Google, changes in the Gmail system may break the tool's ability to function. I cannot guarantee that files stored in this manner will be accessible in the future.
| 16 March 2007 update: A change in the Gmail.com login cause an empty filelist. Download the latest version to access files again. Version 1.0.11 also includes a lot of Windows Vista fixes. |
| 8 Nov 2007 update: Google is preparing for Gmail 2.0 and restructured their login. They will allow 3rd party tools to access an interim version for some time, but be prepared that GMail Drive may need to be updated again soon. Version 1.0.12 fixes the login, and now works with Google Apps accounts (hosted domains) too. |
| 9 Jul 2008 update: A new version was released since some users complained that they had problems with login; please install the latest version 1.0.13 and reboot Windows. |
Be aware that support for this tool may suspend at any time if Google decides to block its use.
Installation Requirements
Internet Explorer 5 or betterInstallation Guide
- Extract the ZIP file to a temporary folder.
- Run the Setup application.
